Wednesday, August 29, 2012

Faces of Cancer - Breast Cancer While Pregnant

In July of 2009 our 28 year old daughter was 20 weeks pregnant with her second successful pregnancy after four miscarriages. She had also just been diagnosed with breast cancer. In the ensuing days of shock and disbelief, she found that local doctors could not present her with an acceptable course of action. By the grace of God she was able to find doctors at MD Anderson who assured her that maintaining her pregnancy and treating her cancer were possible. Her healthy daughter, Rachel, was born on the following Thanksgiving Day.

Fast forward almost three years and Erika found herself nominated to become one of the 'Faces of Cancer' for a local cancer group. Last night a reception was held in honor of the dozen or so survivors and their official 'Faces of Cancer' portraits were unveiled. These photographs will be seen at the local hospital and cancer center.

As an almost 7 year survivor myself, I look at my daughter in awe. She has overcome so much in her 31 years and she has done so with grace. Unfortunately her journey is not over and her 'new normal' has not yet presented itself. Although her cancer is in remission, she suffers from neurological damage resulting from her many cancer related surgeries. I pray that some day she will be pain free and that those who are unkind to her due to her ailments will find it in their hearts to respect her efforts to live as normal a life as is possible.

God bless you, honey, and I pray that your 'new, pain free normal' will come soon.

Below you will find her official 'Faces of Cancer' portrait and the accompanying biographical paragraph.

Faces of Cancer: Erika Vandiver

Life Motto: Life is a bumpy road, but God is the ultimate shock absorber! 

Erika Vandiver was diagnosed at age 28 with Breast Cancer, while 20 weeks pregnant with her second successful pregnancy after multiple miscarriages. She is the 5th generation diagnosed with breast cancer, only she and her mother have survived. She is happily married and the mother of two be
autiful children, a boy and a girl. She took chemotherapy while pregnant and delivered a healthy baby girl, who has been dubbed "the miracle baby". Erika is active at St. Elizabeth Catholic Church and Right to Life of Owensboro. As a self-professed science nerd, Erika makes her career as a Forensic Biologist.


Find Erika on her blog: Erika's Miracle Journey

Or on her Facebook Page: Erika's Miracle Journey Continues

Erika is eager to share her story and hopes to be instrumental in educating many women who are faced with similar situations. Her goal is to save as many babies as possible by telling her story...it's possible to treat cancer while both mother and baby survive!

Thursday, August 23, 2012

Instilling Vocations and a Servant’s Heart

This post first appeared on Catholic Sistas
 
The apple doesn't fall far from the tree. Garbage in, garbage out. Birds of a feather flock together. What is the commonality of these messages? Our surroundings matter. How we live affects who we are. The responsibility is even more pertinent when young souls are involved. They are little sponges, affected by anything and everything around them; how we live paints a clear picture of how they will live. From the time that a newborn mimics expressions and sounds, on through adulthood, humans are under the influence of their environment.
.
As parents (or grandparents) the responsibility we carry is monumental. We want to encourage our children to live a life that will set them on a path of righteousness. Eternal salvation is the goal of all humanity and as the first teachers of our young charges, we have a profound effect on their eternal destiny. It has been said that the ‘do as I say, not as I do’ mentality is ineffective in teaching a child and I’d have to agree. So just how do you steer children down a righteous path? For me the answer is as simple as trying my best to be accountable in my own life.
.
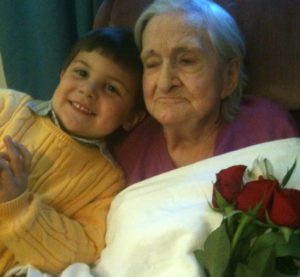
For example, respect for the elderly isn’t just something that you can teach with words. In order to have children fully accept the dignity of all life, they must see and they must do. So visits to a nursing home to see an elderly relative are a prime opportunity for a teaching moment. Children are born without the prejudices that we adults have. They respond to the elderly in an innocent and loving way. The fact that their faces may be wrinkled or that they don’t remember who you are totally escapes a child. All they see is the twinkling eyes and the eager smile of another human being. A recent visit to my husband’s 97 year old grandmother provided just such an opportunity. Our visits are necessarily brief because she doesn’t really recognize us these days and she tires quickly. So after hugging and kissing her, our 2 and 4 year olds simply went from wheelchair to wheelchair dispensing kisses and hugs as they went. The residents glowed under their attention and the innocence of the kids would have shamed many of us with our preconceived notions.
.
Another opportunity arises when it is our turn to clean our small rural church. As a housewife, I’m not particularly overjoyed to add another ‘household’ to my cleaning duties. Yet the kids are certainly game. They brandish their dust rags, straighten missals, and raise kneelers with gusto. The empty church presents us with a wonderful teachable moment, a chance to explain things to them in an environment that does not disturb others. Why is there a red flame flickering above that golden door? The fact that Jesus is present in the Blessed Sacrament may not be totally comprehendible to them at such a tender age but they dutifully ‘bow to Jesus’
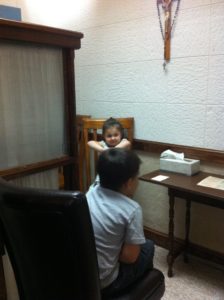
each time they pass by. What’s behind the doors in the sacristy? Here they can see the vestments for priests and servers. We can even discuss liturgical colors. The big book on the side altar – that’s where the prayers are for the priest to read during Mass. They see the lectionary on the lectern, where Papa sometimes stands to read scripture. And the confessional! That really affords a great opportunity. As I explain the purple stole and the screened kneeler, Simon sits in the priest’s seat. Rachel sits in the opposite chair and learns that Jesus listens as we confess our sins to the priest. Ever observant, they point out the crucifix on the wall. It brings a warm smile to my face when, upon exit, Simon announces that he will be a priest some day!
.
Now back to the cleaning. As I vacuum, Rachel and Simon perform their duties of dusting and straightening. Of course, things are not quite as simple as foreseen and Rachel exuberantly dips her hand into the bowl of water sitting ready for a Baptism on Sunday morning. So down on her knees she goes, wiping the offending droplets from the polished wooden floor. As she finishes I try to enlighten her 2 year old mind that this water is not for playing. I also tell them about their own baptisms. As we put away the cleaning supplies and head for the door, they have the opportunity to practice genuflection and then we’re off to other things.
.
Our children see so much from us and from the world. We don’t always realize just what they have observed until they become backseat drivers, admonishing someone to stay on their side of the road - using an uncomfortably familiar stern voice. They watch us when we are at our worst and derive a sort of mindset about typical reactions to broken dishes, spilled lemonade or piles of laundry. While we are certainly not always on our best behavior, having children around reminds us to try our best. If we take responsibility for our actions and how they affect the youngest members of our family, we will become more aware. This, combined with regular confession, will help us become better people and will in turn make us a better example for them. It’s a win-win situation really – do yourself, what you want them to do. Hopefully you’ll all attain that eternal reward.
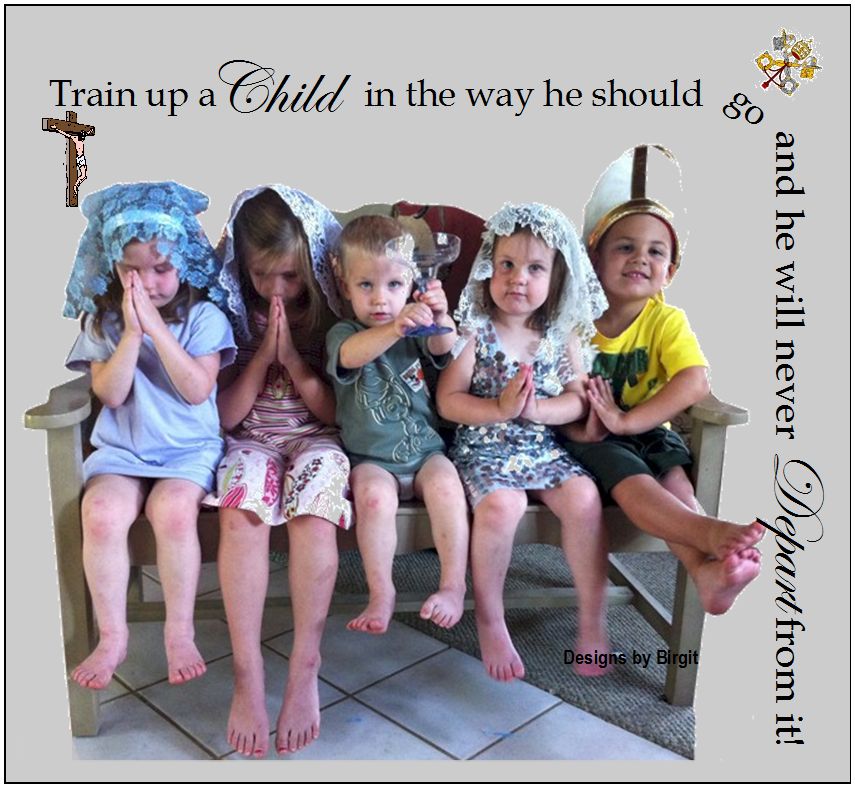
 The above is an image I created. To see more of my original pro-life, pro-family images please visit www.DesignsbyBirgit.com or Designs by Birgit on Facebook.

Tuesday, August 21, 2012

Playing to Learn

I have to admit, I'm new to homeschooling toddlers. Back in the day, I homeschooled our now 24 year old from 5th grade through 8th. That four years was filled with structure and many activities including Science Olympiad, plays at the local theater, and a myriad of sports. We used the Seton curriculum and I loved it for it's concise methodology. Our day began with 7:00 a.m. Mass, where Mark served every day, and lasted until early afternoon - depending on his motivation that day. Mark has ADD, so I had to build in plenty of 'change ups' in order for him to be able to focus. Do religion - empty the trash, work on history - shoot a few hoops. He wasn't like our other children who would sit for long periods of time, nose to the grindstone, and get work completed all in one long session.

Although there are similarities in an ADD child and toddlers, the older child came equipped with a developed  skill of handwriting and other previously learned lessons. With young children, they really are a clean slate. I don't necessarily have to 'unteach' anything yet there is a lot of prep work for later learning. While this set of kids is well versed in the basics - colors, shapes, letters and starting sounds, numbers and simple math, their fine motor skills are very primitive at this point. I've done different things to help them with this - for example, Clean Finger Painting and working with sorting small colored pebbles. It's been encouraging to hear suggestions from mothers of toddlers in my Facebook Homeschool group and to use ideas gleaned from blogs and Pinterest. All in all, I'm quite pleased with the past two weeks.

The aforementioned play breaks can be a continuation of learning, however, and I have found that we all enjoy new approaches. Today, I decided to give another Pinterest idea a try. I made an indoor badminton game using paper plates, paint stirrers, and balloons. They learned sharing, team work, and hand-eye coordination. I was quite surprised at how well the two-year-old did! Here's what I did:

Materials:
2 large paper plates
2 wooden paint stirrers
1 balloon
Stapler


Create:
Center paper plate over wooden stick, leaving enough sticking out one end to create the handle.
Staple securely into place on the paper plate side.
Blow up the balloons.


Balancing

Play:
Give each child a 'racquet'
Instruct them to volley the balloon back and forth, trying not to allow it to touch the floor.
You can also give them each a balloon.
Another excercise is to tell them to balance the balloon on their racquet as they walk, without allowing it to float away. This will teach them balance and patience.

The resulting hours of fun will stimulate their imagination, help them expend lots of energy, and serves as a great incentive for neatly completed work.


Balloon and paper plate badminton. 

Monday, August 20, 2012

Low Carb Broccoli Salad

Hubby and I have been low carb, wheat free for 2 months now and have settled in quite nicely. We have each lost 18 pounds, our energy is up and our blood pressure is down. One of our favorite 'go to' recipes follows. It compliments any type of meat.

Low Carb Broccoli Salad

3-4 cups fresh broccoli, chopped
3 T Hellmann's mayonnaise
2 T white vinegar
2 T Splenda or sweetener of your choice
1 cup fine shredded Cheddar cheese
4-6 slices cooked bacon, crumbled
1 small red onion, finely chopped
Salt and pepper to taste

Combine mayonnaise, vinegar, and sweetener - whisk until thoroughly mixed. Add all other ingredients and combine. Eat!

Thursday, August 16, 2012

Homeschool: Clean Finger Painting

OK, I'll admit it...I hate 'messy'. Even as a child, I just didn't get the concept of a - eeww - sandbox. I would stand there, fingers splayed, until my mother came to clean me up. This continued into adulthood and people would often remark, in wonder, about how I could help my husband set tobacco and come out looking fresh as a daisy - after 8 or 9 hours under the scorching sun, handling thousands of little tobacco sets. I'd learned how to stay clean even in messy circumstances.

Fast forward to parenthood and you might note that my adult children still associate a 'good' toy with one that comes with a case. That way, the one toy at a time rule is much simpler and even young children can be employed to help clean up their own mess. At All Saints Catholic Home School this idea reigns supreme. I can whip out hand and foot prints with nary a drop of paint spilled and even cooking with the kids is a tidy enterprise.

With a 2 and 4 year old to teach, however, I am having to look for ways to aid their manual dexterity. Both kids know their colors, shapes, letters, and numbers so the natural progression seems to suggest that it's time for some writing practice. Anyone who has taught hand writing to young children, however, will tell you that it's a time-consuming endeavor. Simon is a typical boy and goes at everything with male gusto. His lines become too long, his S's have too many curves and his O's look more like a tornado about to hit.
Note how all of the I's are one long line. lol

I've already found a couple of very helpful ideas on Pinterest and they seem to be doing the trick. One, very simple one, is to simply draw out his letters with a yellow highlighter and then allow him to trace them. For added incentive, I allow him to use a coveted ink pen! I do this at the top of every paper as well as papers dedicated specifically to this task. He is already showing some improvement - when he slows down enough to resist the temptation of racing through the effort.

I tried another Pinterest idea today and both kids enjoyed it immensely - and there was absolutely no mess!!!


Materials:

Board or tabletop
Gallon Ziplock bag
Finger paint
Tape - I used the blue, low-stick painter's tape


How to Assemble:

Open bag and squeeze paint into interior...I used four colors
Carefully flatten bag to remove excess air and zip.
Lay on board or table top and tape on all four sides.
Voila! Allow kids to mix colors by pressing against the colors in the bag.
When they have enjoyed their color mixing, ask them to trace letters or shapes.

This is an idea that can be used over and over again...even on car trips or outdoors. Instead of making two, I only made one to teach them about taking turns. It also makes it more desirable when each one doesn't have one...at least with my crew! Enjoy!

Thursday, August 9, 2012

Homeschool Garden to Kitchen

Day two of All Saints Catholic Home School and we are falling into a nice pattern. With a 4-year-old and a 2-year-old, I am not going to be overly rigid, so I set out a plan of what to accomplish on any given day and then find the most opportune times to fit it into our day.

Fresh from the garden!
As rural folk, we grow much of our own food and have also attempted to almost completely eliminate anything processed from our diet. My ex-farmer husband turned biomass energy engineering guru, still has the urge to grow a 'crop' so we always have WAAAAAY too many tomatoes and other produce. One way to remedy this situation is for me to make my own spaghetti sauce and tomato paste. Here's where practical learning comes in once again.

The kids have been involved from the very first seed planted this spring. When we jump on the 4-wheeler to check the mail down our 1/4 mile driveway, we always come up the back way and 'check Papa's crops'. Yesterday, Papa (on a break from his home office) took the kids out to the tomato patch just outside our back door. They picked a LOT of tomatoes! That meant it was time to preserve them before there was any waste - waste not, want not!

The 'recipe' is easy:
Straining out skins and cores.

  • Cut tomatoes into quarters - don't worry about peeling or coring
  • Place into a large stock pot (low heat/simmer) - or crock pot (high) and cover with lid
  • Cook all day and then strain to remove seeds, skin, and ends.
  • Return to pot and reduce to desired concentration - no lid.
  • If you are making paste - reduce until a thick, pasty consistency is achieved.
  • If you are making spaghetti sauce - allow to thicken to desired consistency.
  • Some batches are made plain and some batches also have additions of fresh garlic and basil added.
Botany class - weeds vs. flowers identification.
  • I never add salt or sugar.

Tomato paste stored in re-purposed baby food containers.


Number printables - FREE


We also worked on the letter A and the number 0 (zero).

Do you pray and say the pledge of allegiance before class?

We do!

Wednesday, August 8, 2012

Homeschool Kitchen - Fruit Chews

So today is the first day of school for All Saints Catholic Home School! ASCHS hasn't been active since our youngest was in 8th grade - some ten years ago! Of course, as a stay-at- home Nana, I have certainly done my share of creating teaching moments for my young charges, but today we began in earnest once again.

Simon is 4 and will be taught a combination of pre-school and kindergarten material. He comes well equipped already. He's known his letters by sight from about 18 months or so and can recite the alphabet, count, and sound out the beginning letters of words already. Math has also come easily to him and he can do simple addition such as 3 + 3 = 6.

Rachel is 2 and knows letters and numbers by sight as well as shapes and colors. She must have inherited (and assimilated) Simon's natural propensity for absorbing anything and everything she hears even once. Although she is still quite the precocious, active toddler, she is also determined to please - at least most of the time. Add the fact that she is potty trained, and I am happy to say that the revival of my role as teacher should be quite smooth.

In addition to beginning class time, I have always added a bit of practical learning into the mix. Today, after writing, math, and drawing, we had a kitchen lesson on how to make your own fruit chews. As anyone who has children knows, these little bits of gelatinous goodness are on most children's short list of favorite snacks.  Since we have been working very hard on making most of our meals from scratch, due to a new-found determination to eat healthy and natural, fruit snack creation seemed a logical step. So when I saw a pin on Pinterest, it went into the 'do it now' hopper of my brain. We purchased all of the necessary components yesterday and the kids and I made them - lickety split!

These are actually tiny ice cube trays
Preparation:

Gather: small sauce pan, measuring cup, plastic spoon and molds.
Lightly spray your molds with Pam (for easy removal).

Ingredients:

1/3 cup apple juice (the original recipe calls for water)
1 pkg Jello
1 pkg Gelatin

Apple juice, Jello,plain gelatin, Pam and molds.
Instructions:

Combine all ingredients in a saucepan and bring to a boil. Stirring constantly, make sure that the dry ingredients have completely dissolved.

Carefully pour mixture into molds until almost full.

Refrigerate for about 20 minutes and then pop out of molds onto a paper napkin (absorbs any condensation).

Allow to set and adjust to room temperature.

Serve or store. They do not have to be refrigerated and will stay edible for much
longer than they will last!

First day of All Saints Home School - A is for Angel.

FREE printables here.

Monday, August 6, 2012

Cloud Tutu Tutorial


The reason I call this the cloud tutu is because there is no way to control it - it's just messy and puffy, fluffy and over the top! The OCD part of me took a while to acknowledge its cuteness but cuteness won out. After you get the hang of it, it's quite simple to make - although, I have to admit, the first one took way longer than I had anticipated. The second one was easy and quick. I also learned that cutting the tulle with a paper cutter is much easier and creates a neater cut.

One of the great things about this project is that there is no sewing required! Here are the instructions and my thoughts on how to simplify the project:
First, the materials list:

1-1/2 yards of tulle
1 foot of headband stretch ribbon
1 button or some ribbon
Optional - pony beads in coordinating colors

Now the instructions:
  • Cut the tulle into 18" strips of about 3-5 inches in width
  • Combine two strips and feed into every other opening of the headband ribbon
  • Pull through halfway and then tie into a simple knot (be sure not to tie too tight)
  • Continue until the desired width is achieved (based on child's waist)
  • Either sew together using a sewing machine or hand sew a button to join the ends.
  • If you want to add extra embellishment, string beads onto every other strand or attach bow

Voila! The tutu is ready for twirling by your little princess!

Sunday, August 5, 2012

More Pro-Life Graphics - Ready to Share!

About a week ago I introduced you to my new project - creating and sharing pro-life graphics. Since then I've been cranking them out on an almost daily basis. These posters are FREE for your use as long as you give credit where credit is due. I have just completed my third page of this graphics and wanted to share a screenshot with you. Feel free to visit my website, Designs by Birgit and check them out!


Friday, August 3, 2012

The One Where I'm Featured on Catholic Sistas 7 Quick Takes Friday

Catholic Sistas periodically does a blog post called Quick Takes Friday, in an interview type format. As one of their 'Ink Slingers', I was honored to be invited to participate this week. The gist is to choose 7 questions and to write a brief response to them. Here is one of the questions and my answer...
Hope Memorial at Brescia University - dedication.

What volunteer activities are you involved in?

I have been involved with the pro-life movement since Roe vs. Wade was decided while I was in high school. I chose the pro-life side in a current events debate, and my heart simply caught fire for the cause. This passion has taken me many places, from the halls of the capitol to marches and rallies. I have served as an executive director, vice-president, newsletter editor, and board member of several pro-life organizations. Presently, I serve as a member of our diocesan Gospel of Life committee. As a passionate pro-life advocate, I can also be found “freelancing” by initiating rallies. Once I read about a fundraiser for a pro-abortion candidate planned at a local Catholic parish hall. Within four hours, there were more than 60 people assembled, holding pro-life signs, to protest the use of church property. A happy surprise? We were joined by the pastor of the parish in question!

Find the six other questions and answers at 7 Quick Takes Friday, no. 4


Thursday, August 2, 2012

The Red Convertible


The young woman in the red convertible is very attractive. She sports long flowing hair and blood red fingernails, tapping to the rhythm of loud rock and roll emitting from her radio. I glance in her direction, not really paying much attention, yet taking note of her exuberant youth and carefree bearing. Ah, another young person, our target in this game of life and death. Wondering how to best reach them and marveling at her lackadaisical life, I look away and continue my thoughts.

Tap, tap, tap – blood red fingernails are making a staccato sound on my closed window. Slightly startled, I look up to see the girl from the convertible looking intently at me. 

Wednesday, August 1, 2012

Pro-life Graphics - Crankin' 'em out!

Well it's been a few days since I revamped by Designs by Birgit website and started working on my pro-life graphics in earnest. I have to say that I am totally enjoying the fact that the creative juices are once again flowing. Of course, I've had some premo photos of gorgeous babies to work with! Here, I will show you just a little sample of what I do. Some of these photos are so well done that all I have to do is add a bit of text. Others, however, take a bit of imagination to turn into something satisfactory for my purposes.

As always, I am hoping that some of you will send me your baby photos, quote suggestions, and ideas. It's always fun to make something a group effort by collaborating with others. Also, be sure to check out my Facebook page: Designs by Birgit - Nana's Kiddies. That is where all of my pro-life graphics debut! I'd love it if you would join my page and give me some comment love <3
This is the finished graphic


This is the original photo


This is the original photo 
The finished graphic with a bit of zip


As always, I encourage you to share the completed graphics on Facebook or anywhere you think that they might help enhance the pro-life credit. I do ask that you not use the originals and to give credit where credit is due. Here's the link to my website and all of my graphics.


In His Name for Life,   Birgit J